The Build
During the week after I left Mikey's, he began to disassemble my DRRI. Every day or so, Mikey sent me digital photos of his progress. He also spent a lot of time emailing me the exact details of what he was doing and why. These have become a wonderful source of information for this article. Whenever I had a question about some aspect of the project, I'd send Mikey an email and he would patiently and thoroughly answer my questions.
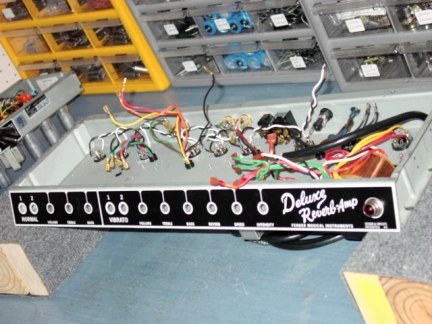
The PCBs, pots and jacks are removed during the disassembly of the DRRI
After removing the PCBs, iron, filter board, pots and jacks from the DRRI, Mikey built a brand new filter board and installed the Mercury iron.
In the next photo, note that the black, phenolic octal sockets on the right that will be removed and replaced with high-quality ceramic sockets.
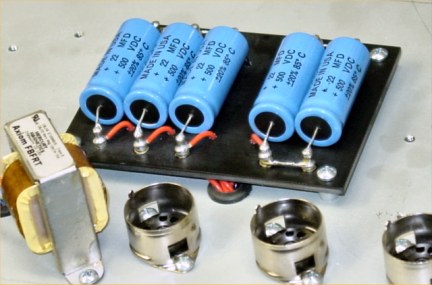
Mercury reverb transformer and Mikey's custom-made filter cap board
Since the Mercury iron is larger than the DRRI iron, the output transformer and choke are slightly offset. In order to keep the output transformer carefully away from the speaker, Mikey drilled a new hole in the chassis to properly position the larger output transformer.
The new filter cap board is a thing of beauty. In a quest for the best components, Mikey chose to use something other than the traditional Spraque Atom capacitors, although these are similar in appearance. They are smaller but have higher specs. For example, the Sprague 20uF caps are rated for 65 degrees centigrade whereas these can go to 85 degrees centigrade. Their tolerances are also tighter.
IAlso in the above photo, you can see the high-quality workmanship on the polished board, turret installation, neat soldering and the use of the red, 18 gauge, stranded 600V Teflon wire. Mikey is primarily using Teflon wire throughout the amp. Mikey prefers Teflon wire because of the superior quality, the strands stay put when twisted and it is easier to solder because the insulation just won’t melt.
The next item on the agenda was the installation of the new (and optional), ceramic octal tube sockets. These hold the rectifier tube and the two 6V6 power tubes. Mikey and I chose ceramic sockets so there won’t be any chance of arcing and burning the sockets. He reinforced the socket mounts by adding hex nuts to the socket mounting bolts, along with a dab of Locktite to make sure they stay firmly attached to the chassis.
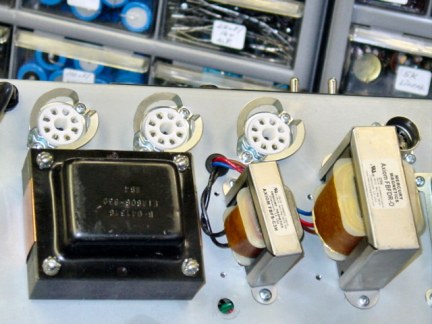
New ceramic sockets, DRRI power transformer, Mercury choke and output transformer
The power transformer is the stock one from the DRRI, which will be replaced next month with a Mercury Magnetics power transformer that is of excellent quality.